Azure Active Directory Library for Android
We have finally announced the Azure Active Directory(AAD) features at Build conference. It was exciting to hear about AAD at Keynotes.This is not an official blog post, but I will show some details about the Android Library and app setup. You can easily libraries access from https://github.com/MSOpenTech/azure-activedirectory-library-for-android and https://github.com/MSOpenTech/azure-activedirectory-library-for-ios
Prerequisites for Android development:
It supports maven based installation, but you need to setup maven sdk deployer to actually do anything with latest Android SDKs since maven repos don't have the latest Android SDKs. You could skip Maven based installation and pull the dependent libraries directly. You could put them under the adal/libs folder.
- Android-Support-v4: Fix project properties and it will be added
- gson library: https://code.google.com/p/google-gson/downloads/list
If you insist to setup maven environment, I will quickly walk through the details for your environment setup.
Install Maven 3.1.1: http://maven.apache.org/download.cgi
Maven helps to manage dependencies and build your project. Our sample app will be compiled with Eclipse ADT, so i am not forcing you to make maven based app.
You need to put the latest android SDKs into local maven repo. You could use these commands to install SDK19 and support library:
git clone https://github.com/mosabua/maven-android-sdk-deployer.git
cd maven-android-sdk-deployer\platforms\android-19
mvn clean install
cd ..\..\extras\compatibility-v4
mvn clean install
You can clone and install from cmd line:
git clone https://github.com/MSOpenTech/azure-activedirectory-library-for-android.git
cd azure-activedirectory-library-for-android
mvn clean install
How to Add Android Library to your Project
- Add reference to your project as Android library. Please check here:http://developer.android.com/tools/projects/projects-eclipse.html
- Add project dependency for debugging in your project settings
- Update your project's AndroidManifest.xml file to include the authentication activity:
  <uses-permission android:name="android.permission.INTERNET" />
  <uses-permission android:name="android.permission.ACCESS_NETWORK_STATE" />
  <application
        android:allowBackup="true"
        android:debuggable="true"
        android:icon="@drawable/ic_launcher"
        android:label="@string/app_name"
        android:theme="@style/AppTheme" >

        <activity
            android:name="com.microsoft.adal.AuthenticationActivity"
            android:label="@string/title_login_hello_app" >
        </activity>
  ....
  <application/>
Setup Native Client App at Azure Active Directory
- Register your WEBAPI service app at Azure Active Directory(AAD),https://manage.windowsazure.com
- You need APP ID URI parameter to get token
- Register your client native app at AAD
- You need clientId and redirectUri parameters
- Select webapis in the list and give permission to previously registered(Step5) WebAPI
- You need APP ID URI parameter to get token
- You need clientId and redirectUri parameters
- Select webapis in the list and give permission to previously registered(Step5) WebAPI
Go to Azure portal:
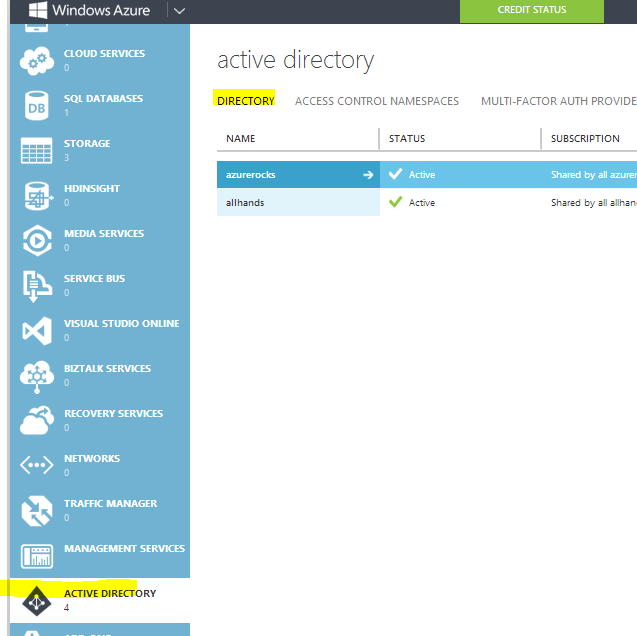 |
| Create Directory entry if you don't have at Azure portal |
 |
| Add an explication that you are developing |
 |
| Define Native Client app to create Android app entry |
Redirect Uri needs to be unique. It is better to link to your domain. If you don't have, you can use your azure active directory address like "yourtenant.onmicrosoft.com".
 |
| Define unique RedirecUri entry |
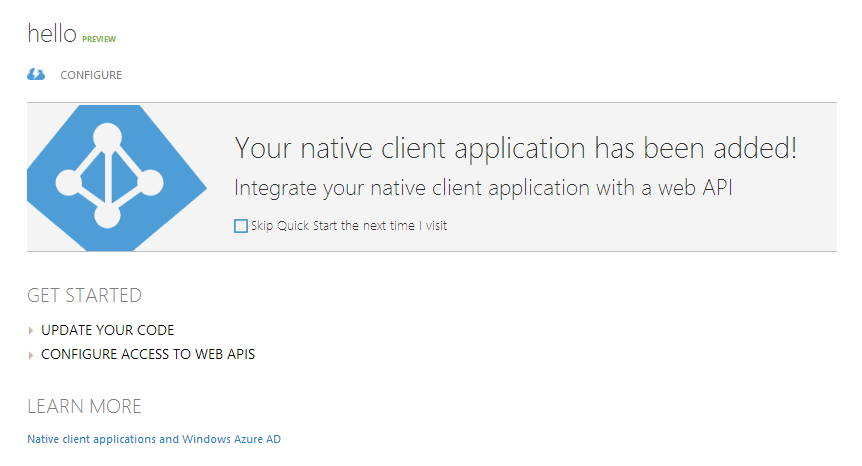 |
| Configure the entry for permissions |
Update your app for App settings
- Resource is required, Clientid is required. PromptBehavior helps to ask for credentials to skip cache and cookie. Callback ill be called after authorization code is exchanged for a token. It will have an object of AuthenticationResult, which has accesstoken, date expired, and idtoken info.
- You can always call acquireToken to handle caching, token refresh and credential prompt if required. Your callback implementation should handle the user cancellation for AuthenticationActivity. ADAL will return a cancellation error, if user cancels the credential entry.
Authority Url and ADFS
ADFS is not recognized as production STS, so you need to turn of instance discovery and pass false for validation at AuthenticationContext constructor.Authority url needs to be in the form of STS instance and tenant name: https://login.windows.net/yourtenant.onmicrosoft.com
Usage of AuthenticationContext
- Create an instance of AuthenticationContext at your main Activity. You can look at sample projects that is used for testing.
mContext = new AuthenticationContext(MainActivity.this, authority, true); // This will use SharedPreferences as default cache
mContext is a field in your activity. Copy this code block to handle the end of AuthenticationActivity after user enters credentials and receives authorization code:
 @Override
 protected void onActivityResult(int requestCode, int resultCode, Intent data) {
     super.onActivityResult(requestCode, resultCode, data);
     if (mContext != null) {
         mContext.onActivityResult(requestCode, resultCode, data);
     }
 }
To ask for a token, you need to define a callback:
private AuthenticationCallback<AuthenticationResult> callback = new AuthenticationCallback<AuthenticationResult>() {

        @Override
        public void onError(Exception exc) {
            if (exc instanceof AuthenticationException) {
                textViewStatus.setText("Cancelled");
                Log.d(TAG, "Cancelled");
            } else {
                textViewStatus.setText("Authentication error:" + exc.getMessage());
                Log.d(TAG, "Authentication error:" + exc.getMessage());
            }
        }

        @Override
        public void onSuccess(AuthenticationResult result) {
            mResult = result;

            if (result == null || result.getAccessToken() == null
                    || result.getAccessToken().isEmpty()) {
                textViewStatus.setText("Token is empty");
                Log.d(TAG, "Token is empty");
            } else {
                // request is successful
                Log.d(TAG, "Status:" + result.getStatus() + " Expired:"
                        + result.getExpiresOn().toString());
                textViewStatus.setText(PASSED);
            }
        }
    };
Ask for a token:
 mContext.acquireToken(MainActivity.this, resource, clientId, redirect, userid, PromptBehavior.Auto, "",
                callback);
Querying cache items
ADAL provides Default cache in SharedPrefrecens with some simple cache query fucntions. You can get the current cache from AuthenticationContext with:ITokenCacheStore cache = mContext.getCache();You can also provide your cache implementation, if you want to customize it.mContext = new AuthenticationContext(MainActivity.this, authority, true, yourCache);Logger
ADAL provides simple callback logger. You can set your callback for logging.Logger.getInstance().setExternalLogger(new ILogger() { @Override public void Log(String tag, String message, String additionalMessage, LogLevel level, ADALError errorCode) { ... } } // you can manage min log level as well Logger.getInstance().setLogLevel(Logger.LogLevel.Verbose);
Multi Resource Refresh Token
You may have several Web API services that you use in your app. When you get a token for resource1, you could use refresh token from resource1 to get access token for resource2. This will work if you use same authority, clientid and userid in the second call. Internal cache will help to reuse multi resource refresh tokens.
mContext.acquireToken(MainActivity.this, resource1, clientId, redirect, userid, PromptBehavior.Auto, "",
                callback);
mContext.acquireToken(MainActivity.this, resource2, clientId, redirect, userid, PromptBehavior.Auto, "",
                callback);
Happy coding!
------------------------The END------------------------


